|
|
3. Creating a Preview
|
|
Now you have finished with the DBE process you can close the background image. You might want to save it first, if you anticipate using it again.
From this point onwards we need to use a preview image so that we can see what effect each of our transformations will have before committing them to the main image. Unlike some editing software there is no preview on the main image, but we can create one or more preview images from the whole or sections of the main image, and apply our transformations to them. When we find the effect we like, we can apply the transformation to the main image and move on.
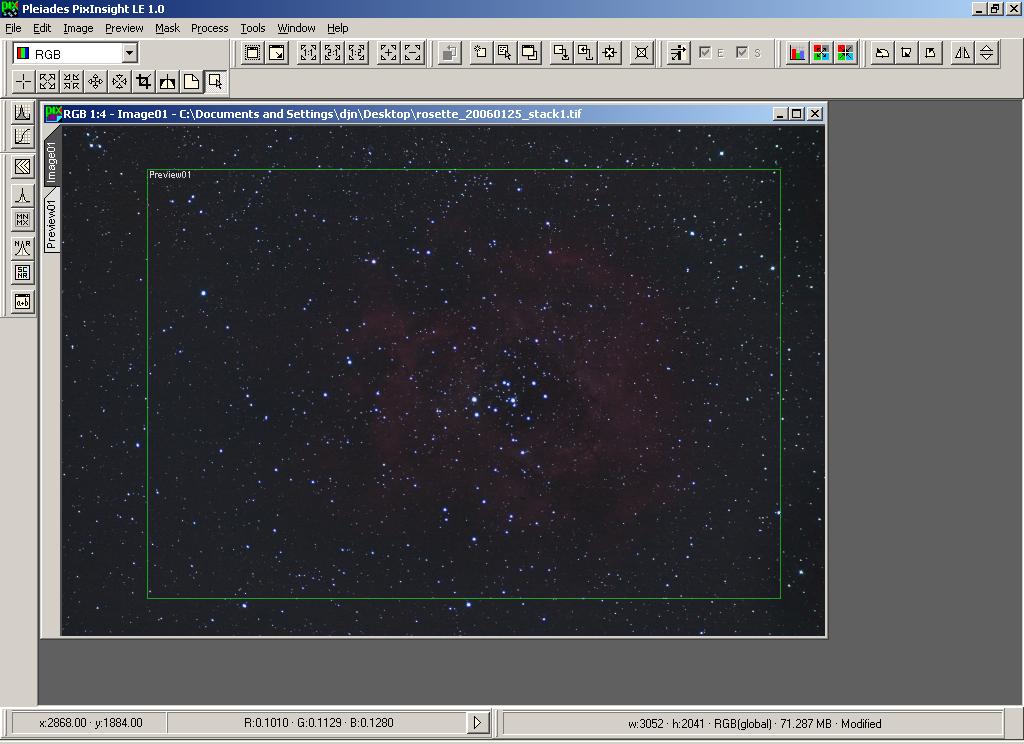
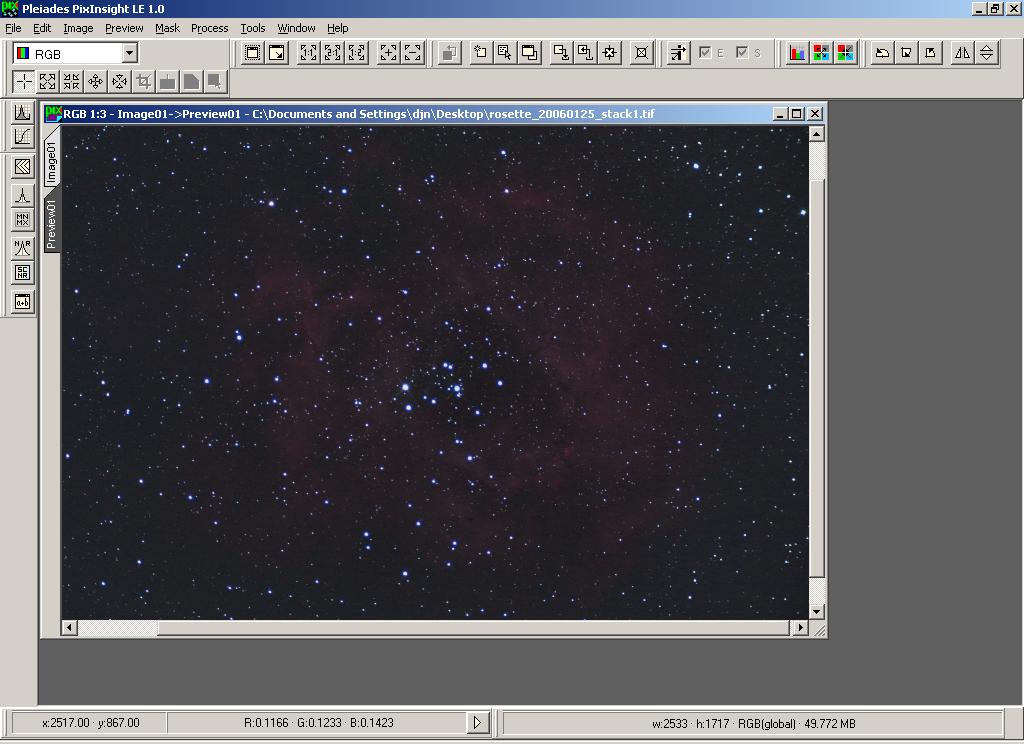
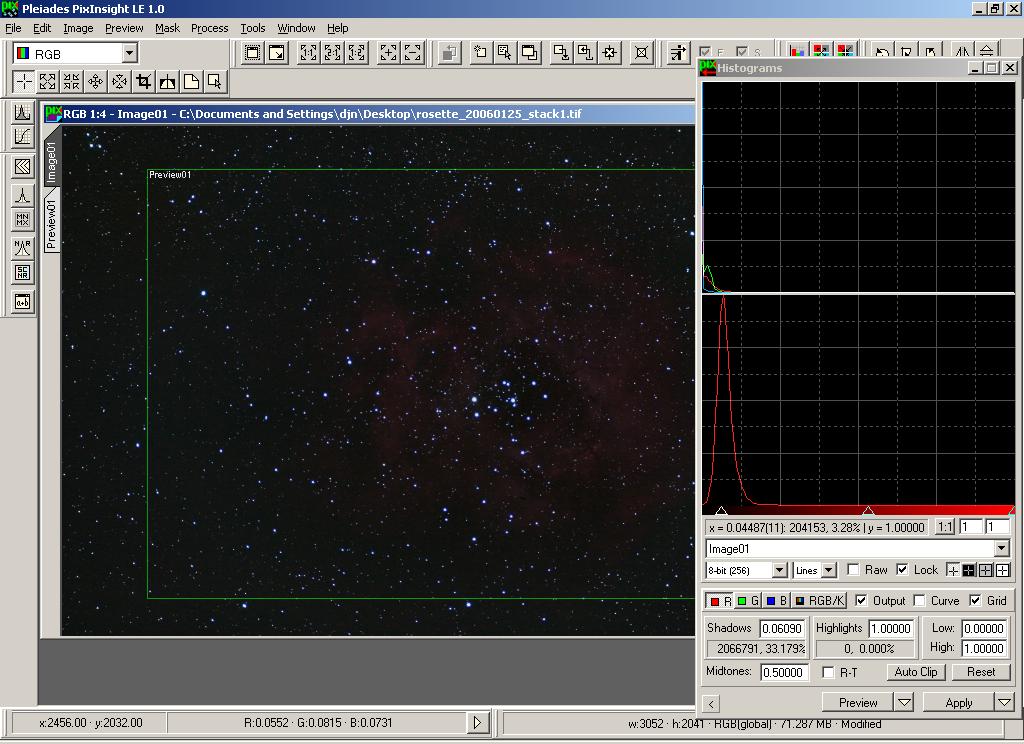
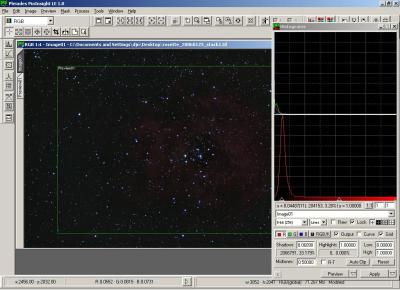
So let's create a preview of a representative sample of the whole image. The easiest way is to go into New Preview mode by right-clicking the image and choosing from the Mode menu, pressing Alt+N, or clicking the toolbar button. The cursor changes and you can drag a rectangular area to define the preview image, as shown. Notice the green border within the main image, and the extra tab on the left entitled Preview01.
|
|
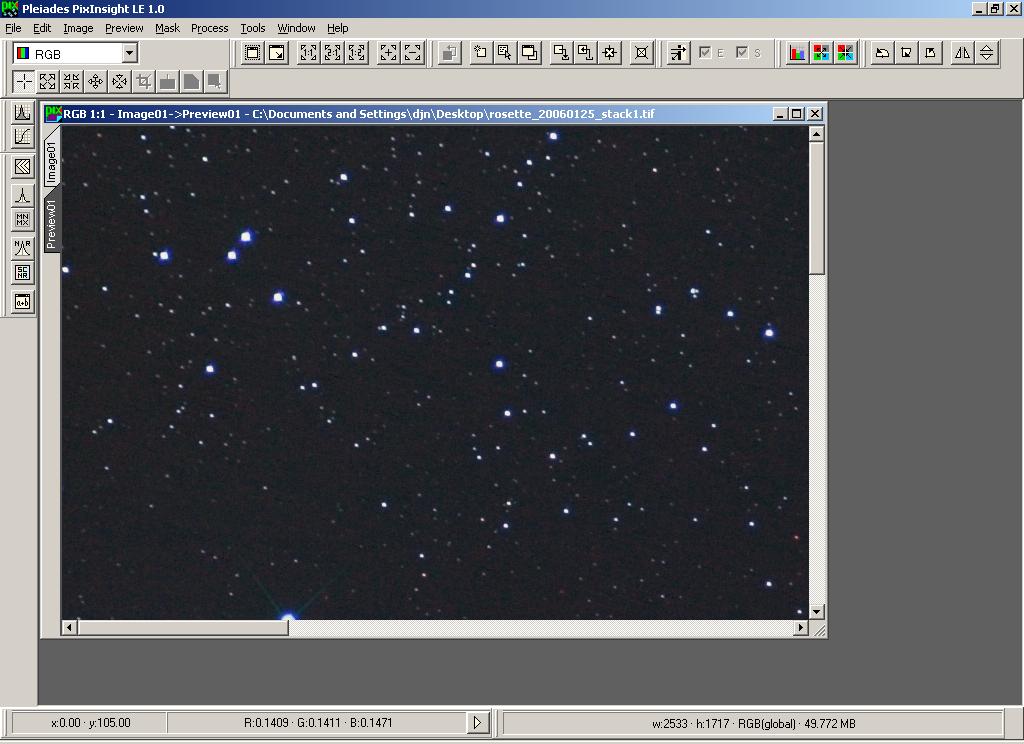
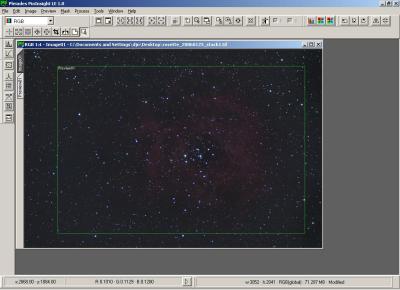
If you click that "Preview01" tab on the left you will see that the preview contains that section of the image defined with the green rectangle, but it is shown by default at full-size (note the scroll bars on the image).
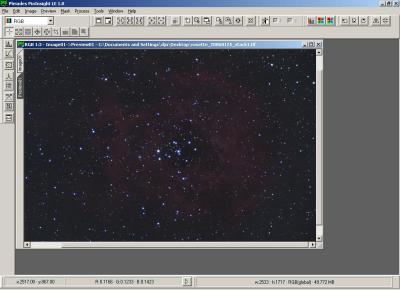
Click the toolbar button with a minus sign  a couple of times to zoom out to 1:4 view. Here, I have done this and adjusted the scroll bars to centre the nebula. a couple of times to zoom out to 1:4 view. Here, I have done this and adjusted the scroll bars to centre the nebula.
|
|

|
|
4. Adjusting Histogram
|
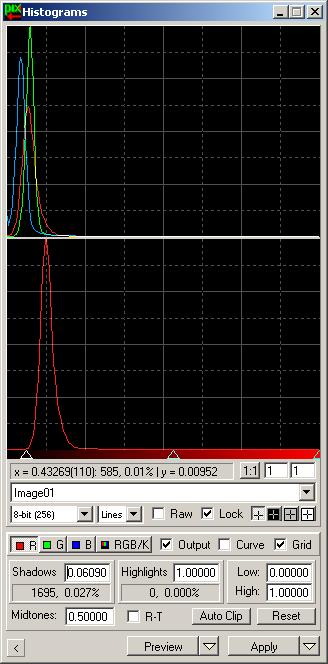
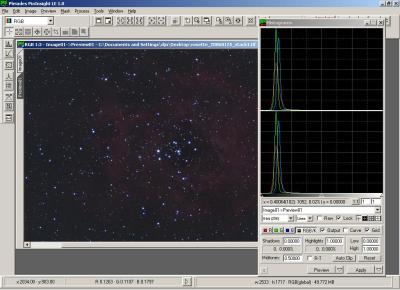
The next process we are going to look at is the Histogram Transformation process. Choose Histograms from the Process->Transfer Curves menu, or click the toolbar button.
The histogram tool can work on any image, main or preview, you have open. To tell it which one to display, click the drop-down control where it says "No view selected" and choose the entry for Image01->Preview01. This will cause the histograms for the red, green, and blue colour channels to be displayed on the lower graph (or a single histogram for a black-and-white image). The top graph shows what the histogram would look like if your changes were applied to the image. This can be useful to avoid "clipping".
If you are working with a black and white image you can adjust the black, white, and mid points using the three triangles underneath the histogram graph.
Move the left one up (to the right) to set the black point to the darkest point in the graph; move the right one down (to the left) to set the white point to the brightest point. Adjust the gamma by moving the middle triangle.
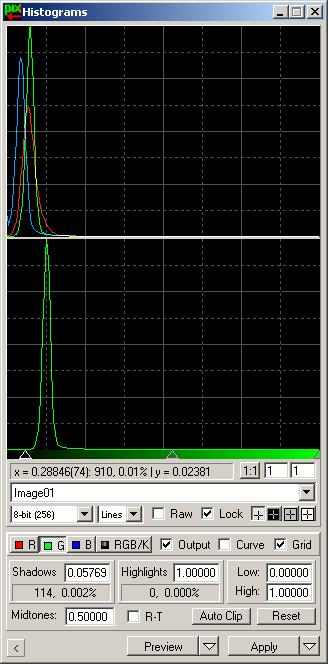
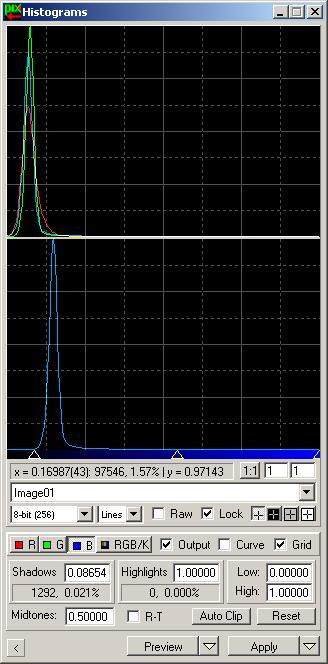
If you are using a colour image you can display the histogram and make adjustments to the individual colour channels by clicking the R, G, and B buttons, or switch back to the combined histogram using the RGB/K button. Contrast with the Levels control on The Gimp in my other tutorial
|
|
|
TIP:If you click the mouse pointer on the preview image a line will show up at the point on the histogram display representing the intensity at that point. Using this information I have adjusted the lower end of each histogram as shown below:
|
|
|
After setting the histogram levels drag the process icon on to the preview image to see how it looks. If it didn't turn out right you can adjust them again and drag the icon to the preview again. You can use the "Reset" button on the Histogram window to reset the currently-selected colour channel, or with the Ctrl-key held down to reset all colours simultaneously.
You can get a real-time preview by clicking the "RT" box. However the quality of the real-time preview image is rather poor and I prefer not to use it myself.
Note: Preview images are special in that each time you drag a process icon to it, the process acts on the original image -- ie. multiple operations on a preview are not cumulative. Normal images are different because each operation is permanent (except for one level of undo) and dragging several process icons (or the same icon several times) will perform the same operation cumulatively on the image.
|
|
|
Once you are happy with the preview image, drag the same icon to the main image. You can cause the main image tab to become active by dragging the icon over the tab on the side of the window (without dropping it). Then drop the icon on the active image. Once the process has completed the preview will update to be the same as the main image, and the histogram graphs will update to reflect the changes. Note however that the settings on the histogram dialog have not changed and will remain even after closing the dialog window.
|
|
|
|
 |
|
All text and images copyright and may not be used without permission
|
|
|
|